Crampons vs microspikes: What you need to know
Winter is a fantastic time to explore Aotearoa New Zealand’s outdoors, but you’ll need the right equipment and skills. To help you stay safe in the alpine, NZ Mountain Safety Council Alpine Advisor and keen backcountry adventurer Bianca Bratton shares her run-down on microspikes and crampons.
Aotearoa has incredible alpine trips that are easy to access and take you above the bushline fairly quickly. While these trips may be relatively achievable in summer, in winter, many require specialist equipment, including either microspikes or crampons, to help you navigate ice and snow safely.
While they can look similar, microspikes and crampons are designed for very different situations. Choosing what’s right for your trip is an important part of your planning. It involves understanding the terrain you’ll be in, current conditions, limitations of the equipment, and the skills you’ll need to use them effectively.
Microspikes: What they are and when to use them
Microspikes have small metal spikes designed to provide additional traction on compacted snow or thin ice. They’re suitable for well-defined tracks or non-technical alpine terrain, where a slip is unlikely to have a serious consequence.
Comprising an elastic or rubber harness, microspikes fit over most hiking shoes and boots. Always check the manufacturer’s guidelines to ensure you’re wearing the correct footwear, as this is critical to their effectiveness. Microspikes are lightweight, so easy to carry in your pack until you need them.
While you don’t need a course to use them correctly, it’s a good idea to practise on short walks before using them for longer trips.
It’s important to understand that microspikes are not adequate for steep or technical terrain, where a slip could have serious consequences.
Understanding crampons
With longer, more aggressive metal spikes, crampons are designed to provide traction on firm snow and ice. The design can vary, with some versions engineered for steep technical climbs on ice and rock, while others are designed for trekking in icy and snowy conditions.
To be effective, it’s crucial to wear crampons with compatible footwear. This ranges from firm-soled tramping boots with a three-quarter shank to rigid-soled mountaineering boots. Flexible-soled shoes or boots are not suitable. Always check the manufacturer’s guidelines to ensure you have the correct footwear for the crampons you’re using, as this will differ between makes and models.
When using crampons, an ice axe is essential, and a helmet is highly recommended. In icy terrain where a fall could have serious consequences, an anchor and a rope may also be needed.
Essential skills for alpine terrain
Having the right equipment for the terrain and conditions is only part of the equation. You’ll also need the skills to use it correctly before you head out.
You’ll need to know how to:
- use crampons correctly
- stop a slide with an ice axe – called ‘self-arrest’
- identify hazardous surface conditions
- recognise when the conditions are beyond your abilities and it’s time to turn back.
The most effective way to learn and practise these skills is by attending a course from an accredited provider. NZ Mountain Safety Council has made this easier, by providing an up-to-date list of course providers across the motu.
After attending a course, it’s recommended to continue your hands-on experience in low consequence terrain before committing to anything steeper or more technical.
Crampons vs microspikes in a nutshell
Microspikes
- Best suited to compacted snow or thin ice on well-defined paths or non-technical terrain.
- Lightweight, easy to fit over most footwear.
- Not suitable for steep or technical terrain where a slip could have serious consequences.
Crampons
- Designed for use in steeper and more technical terrain.
- Larger spikes provide the grip needed on firm snow and ice.
- Require compatible footwear.
- Training is needed to use them effectively.
- Require an ice axe and the skills to self - arrest, plus a helmet.
A word on avalanches
When entering alpine terrain, you may be exposed to avalanche danger. You’ll also need essential avalanche rescue equipment and know how to use it. This includes an avalanche transceiver, probe and shovel.
Before heading out, check the the NZ Avalanche Advisory (NZAA) for the latest avalanche forecast. The NZAA, provided by MSC, issues forecasts for 13 regions during winter and early spring, and year-round for Aoraki/Mt Cook National Park. If your tramp or hunt enters one of these areas, the avalanche danger rating will also be displayed on Plan My Walk, along with a link to the full avalanche forecast, including the current snowpack conditions, travel advice and sliding danger.
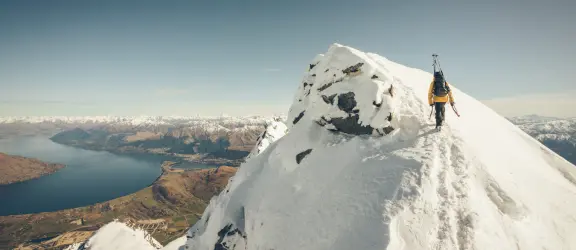
PHOTO CREDIT | Jasper Gibson | Bianca Bratton, Single Cone, The Remarkables
Last edited: August 2026